白皮书下载
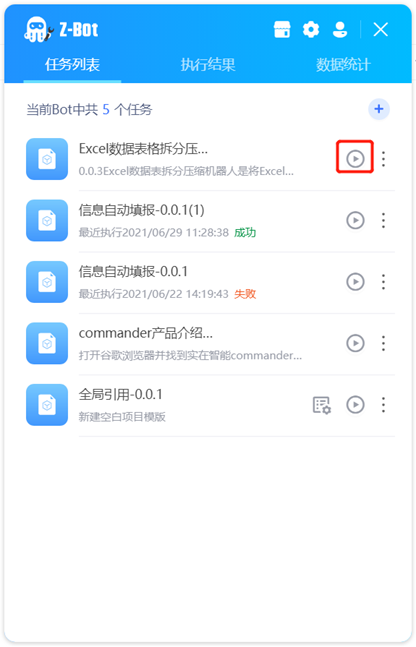
task list
The task list shows all the loaded tasks of the z-bot terminal robot. Here, we can view the task execution progress, execute, stop and delete a task, formulate the task execution plan and import new tasks.
There are many sources of tasks in the task list: tasks generated by uploading the process package locally, tasks generated by downloading the process package from the application market, and tasks issued by the commander intelligent hub. Different login methods support different tasks. For example, the offline activated version does not support sending tasks from the application market or the commander intelligent hub.

one. process import
Click & ldquo; in the upper right corner+& rdquo; No., an import pop-up box will appear. Select a local process package to import, and a task will be generated after import. It should be noted that task import only supports login with activation code.
two, operation/stop it
For unexecuted tasks, click the icon shown in the red box to run the task. After clicking, the task is in running status. Click again to stop the task.
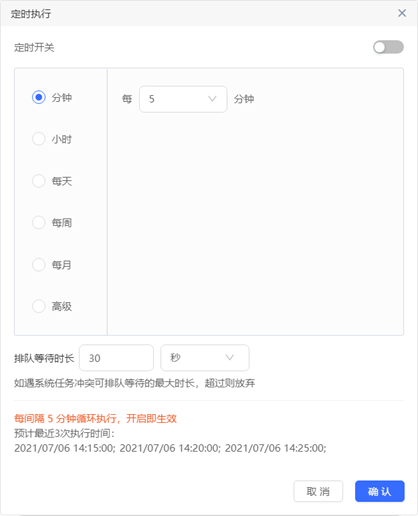
three. setting timing
This paper focuses on the concept of next scheduled task. Scheduled task refers to the task that is executed automatically and circularly at a certain time interval. Take the cycle by week as an example. If you select 12:00 on Monday to execute the application process, the task will be executed automatically every time at 12:00 on Monday.
Click the more icon on the right side of a task, select the set timing option, and the timing setting will appear. Set timing rules according to business conditions. The system supports setting by minute, hour, day, week and month. For users who know more about the corn expression, you can choose to use the advanced mode and enter the corn expression to set timing.
Note: the setting timing only supports the login method using the activation code. The BOT logged in with the account and password sends the task through the commander. The timing setting of the task is set when the commander creates the task.
four. setting trigger
Click more icons on the right side of a task and select the set trigger option to open the set trigger pop-up window.
Note: setting trigger only supports login with activation code.
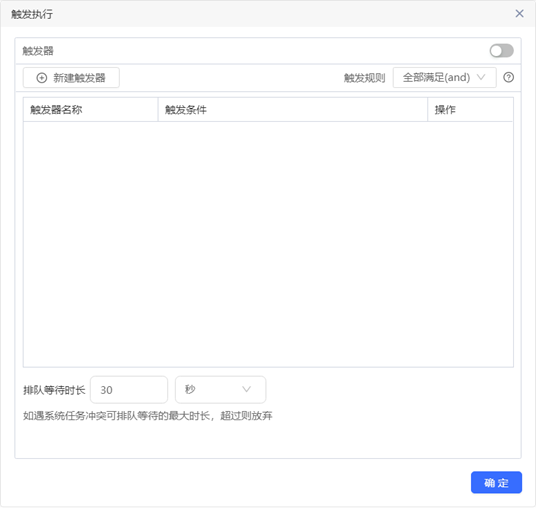
Click new trigger to select the type to be triggered. File trigger, hotkey trigger, mouse trigger and mail trigger are supported.
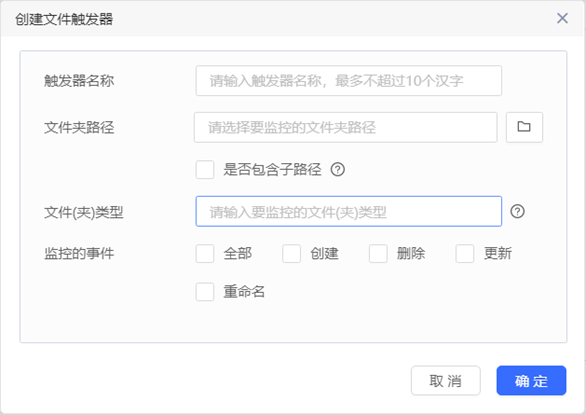
File trigger
Trigger name: required
Folder path: select the folder path to be monitored. If include sub path is selected, the execution of the current task will be triggered when the files under the sub path meet the monitoring events. If do not include sub path is set, only the files under the current folder will be monitored.
Folder type: enter the format to monitor.
Monitored events: select monitored events. Four events are supported: create, delete, update and rename.
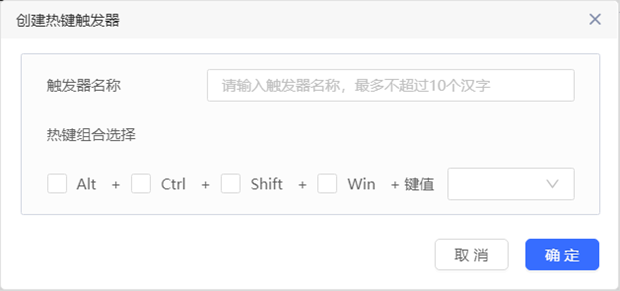
Hotkey trigger
Trigger name: required
Hotkey combination selection: the shortcut combination hotkey to trigger the task
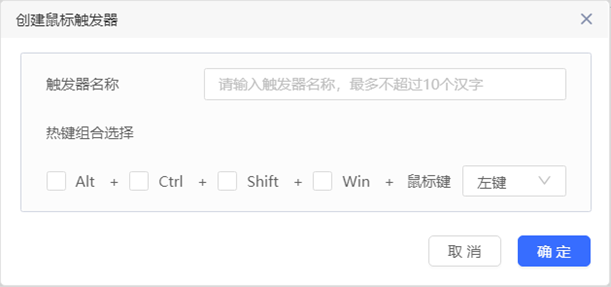
Mouse trigger
Trigger name: required
Hotkey combination selection: the shortcut combination hotkey to trigger the task
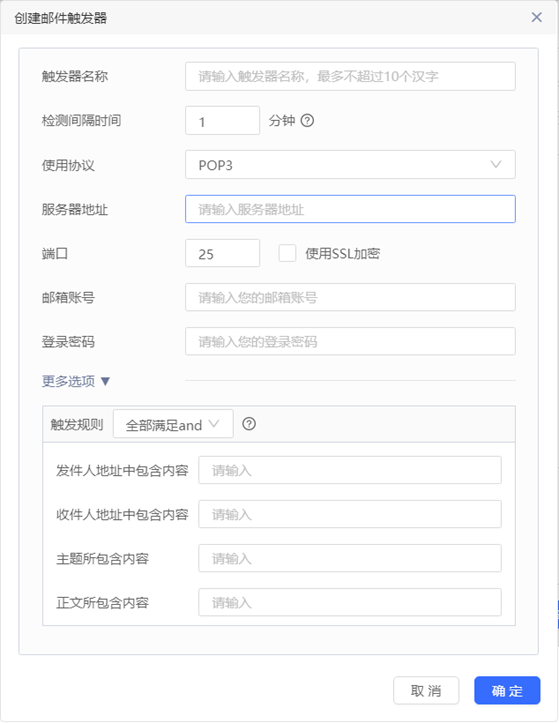
Mail trigger
Trigger name: required
Detection interval: it is recommended to set it to more than 3 minutes, otherwise the mailbox server may be restricted and an exception may be thrown
Usage protocol: the protocol used by the mailbox. POP3 and IMAP are optional
Server address: the server address used by the mailbox
Port: the port to which the mailbox is docked
Email account: email account
Login password: login password of mailbox
More options: it supports the creation of triggers by sender address, recipient address, subject and body content, and can support any trigger meeting one condition / all conditions.
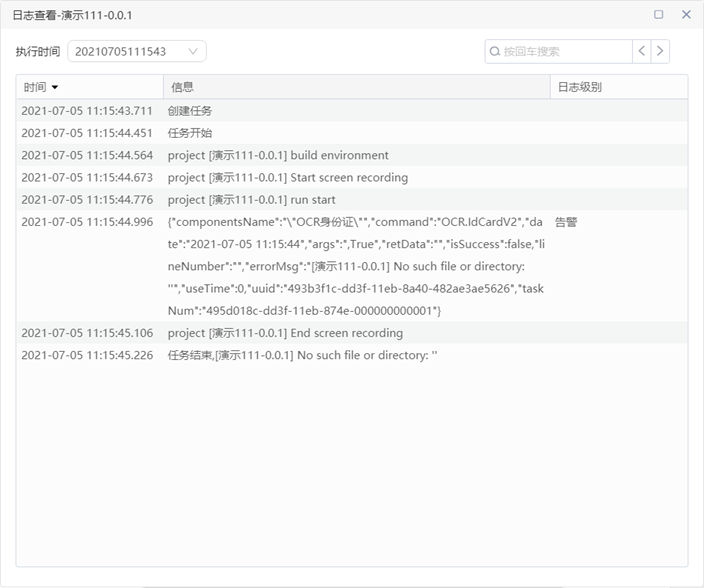
five. view log
Click the more icon on the right side of a task, select the view log option, and the log view pop-up box appears. When a task has multiple execution records, you can click the execution time switch on the left to view the log content of each execution.
six. delete task
Click the more icon on the right side of a task, select the delete task option, and a secondary confirmation pop-up box will appear. After confirmation, you can delete the task.
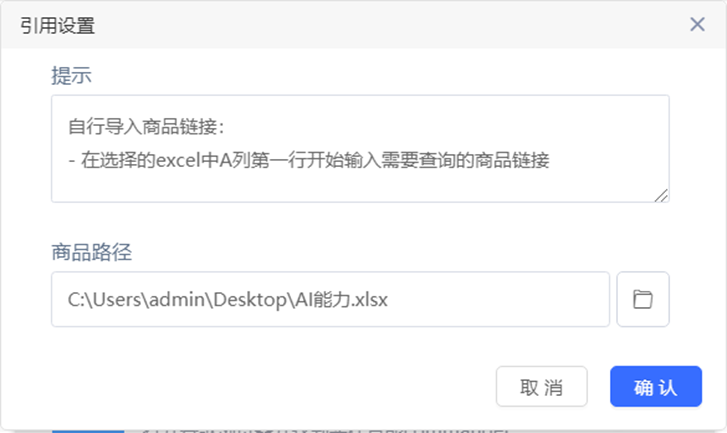
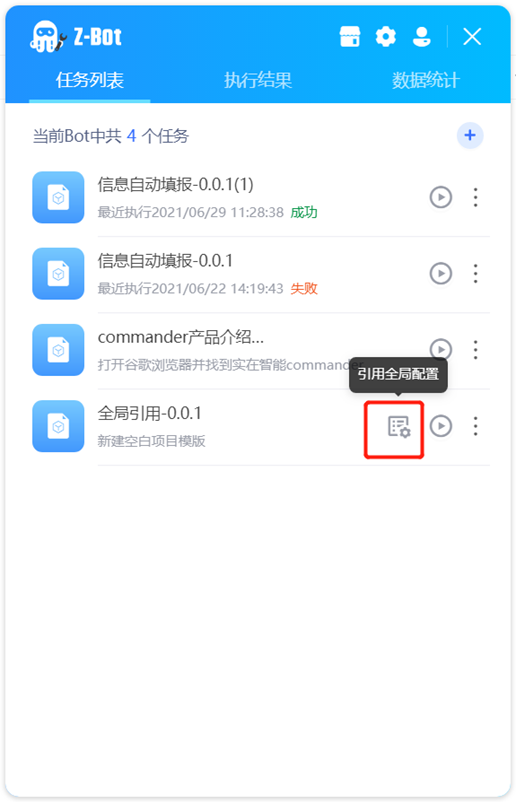
seven. task global configuration
For processes with global reference set, you can set global reference parameters before task execution, and click the icon in the red box to enter the reference setting page. If the process does not have a global reference set, the icon will not appear.
The reference setting page displays the content set in the actual process writing. The content of different processes is different, and can be filled in as needed.